Quantcast
Channel: A Clean Bake
Viewing all 87 articles
Browse latest View live

Baked Shoestring Carrot Fries with Za’atar

$
0
0

Baked Shoestring Carrot Fries with Green Tahini Dipping Sauce

Poor fries. This time of year, especially, they really get a bad rap. Everyone is trying to clean up their diets to recover from the holidays or start the new year off right, and poor fries are tossed aside like yesterday’s trash. While I totally get the logic behind laying off the traditional – starchy, white potato, well fried – fries, the general format is a great way to get an extra serving of veggies on your plate. If, that is, you swap the white potatoes for carrots and the fryer for the oven.

Yes, carrot fries. You’ve enjoyed sweet potato fries before, right? Well these aren’t so different. A fellow root vegetable, they have all the right starches to roast up crispy on the outside and doughy on the inside, just like an oven fry should.

Baked Shoestring Carrot Fries with Green Tahini Dipping Sauce

Finish them off with a dusting of za’atar – a middle eastern spice mix consisting primarily of sesame seeds, thyme, sumac and a few other flavors (which vary slightly by country of origin/brand/person mixing it) that is far less exotic, and much easier to find (thank you, interwebs), than it sounds – and chopped parsley and a dollop of green tahini sauce. 

And since it’s green, I’m preeeeeeetty sure you can count this as salad. 
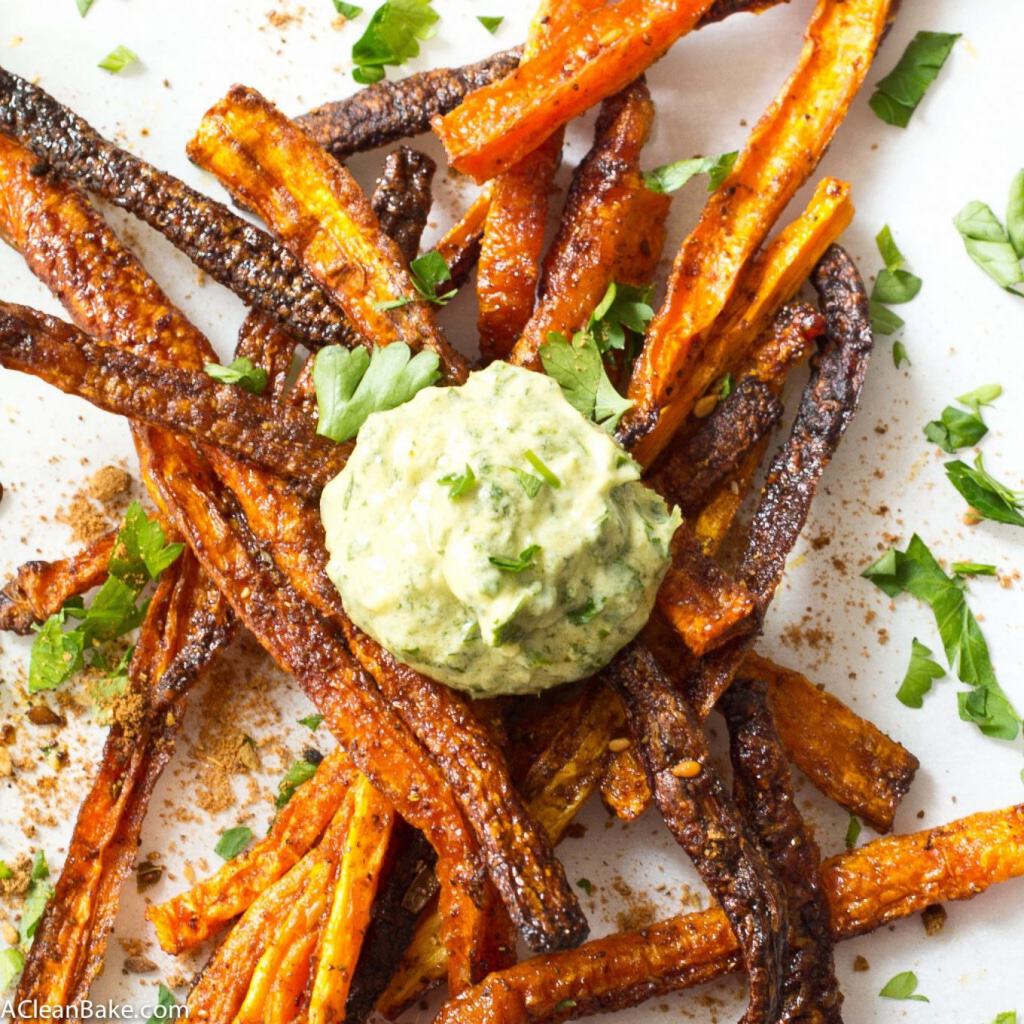
Baked Shoestring Carrot Fries with Za'atar
Print
Ingredients for the fries
  1. 1/3 lb carrots, peeled and sliced into sticks
  2. 1 Tablespoon olive oil, or mild-flavored oil of choice
  3. 1/2 teaspoon za'atar spice blend (see note), divided
  4. Chopped parsley for garnish (optional)
Ingredients for the dipping sauce
  1. 1/4 cup tahini
  2. 1/2 teaspoon granulated garlic
  3. 1/2 cup parsley, gently packed
  4. 1 Tablespoon freshly squeezed lemon juice
  5. 1/4 teaspoon salt
  6. 1/4 teaspoon black pepper
  7. 3 Tablespoons of water
Instructions
  1. Preheat the oven to 375F. Line a large baking sheet with a lightly greased piece of tinfoil or a nonstick pad and set aside.
  2. In a large mixing bowl, toss the carrots and oil, then add 1/4 teaspoon of the za'atar and toss to coat.
  3. Bake for 40-50 minutes, until crispy, then sprinkle with the remaining za'atar and some chopped parsley (optional).
  4. While the carrot fries are baking, make the dipping sauce by combining all of the ingredients in a blender or food processor and process until smooth. Add an additional tablespoon of water if necessary to thin out the sauce if you want.
  5. Serve the carrots while still hot and crispy, alongside the dipping sauce.
Notes
  1. Za'atar is a middle eastern spice mix consisting primarily of sesame seeds, thyme, sumac that is far less exotic, and much easier to find than you'd think, thanks to the internet.
  2. Flatleaf or curly parsley both work for this recipe.
  3. Store the leftovers in an airtight container in the fridge for up to a week.
  4. Dipping sauce inspired by Ottolenghi
A Clean Bake http://acleanbake.com/

Baked Shoestring Carrot Fries with Green Tahini Dipping Sauce

Baked Shoestring Carrot Fries with Green Tahini Dipping Sauce

This post contains affiliate links, which means that if you click through and purchase a product, A Clean Bake receives a small commission, which goes toward continuing to bring you delicious, healthy recipes every week. This does not affect the price you pay. Thanks for supporting A Clean Bake!

The post Baked Shoestring Carrot Fries with Za’atar appeared first on A Clean Bake.


Maple Roasted Turnips with Bacon and Crispy Shallots

$
0
0

Maple roasted turnips are complemented by salty bacon and crispy shallots, and this easy one-pan dish is a perfect side dish or brunch!
Maple Roasted Turnips with Bacon and Crispy Shallots
When you were a kid, did you ever read those American Girl books? Molly was my favorite. That was, of course, back in the day when there were only 3 AG dolls, not a rotating cast of thousands and glossy outposts on some of the highest-rent streets in the world. Ah, the humble, pre-Mattel American Girl days. Back then, it was easy to choose: you were either a Kirsten (blond, hearty, sporty), a Samantha (glamorous, possibly-but-not-necessarily brunette, probably popular), or a Molly (nerd, allergic to sports, glasses mandatory). I was a Molly (no pictures. long ago had them all destroyed. DO NOT LOOK FOR THEM.).

No matter how old I get, I will never stop associating turnips with Molly. If you’re either not familiar with the books, or don’t have a mind that holds on to useless trivia like a steel trap (but releases important information like names of people you just met 20 seconds ago) like I do, here’s the gist of it: Molly’s story takes place in the middle of World War II, during which time food was rationed and people grew a lot of what they ate. Molly’s family is having turnips for dinner, and Molly is not allowed to leave the table until she finished them which, of course, she’s having trouble doing because they’re – in the book, according to Molly – terrible. Until someone – her mom? her housekeeper? I dunno. The books are packed in a box somewhere and I don’t feel like digging them out. – surreptitiously reheats her turnips with some (forbidden! highly rationed! worth its weight in gold!) butter and sugar, thus rendering the turnips palatable and an entire generation of young women highly suspicious of this root vegetable that they probably hadn’t ever tried for themselves before.

Maple Roasted Turnips with Bacon and Crispy Shallots

If you were a mousy, brown-haired, bespectacled child, Molly was your leader and if she didn’t like turnips, then turnips were dead to you.

But with all due deference to Molly, I don’t know where her turnips came from because once I finally tried turnips, I was surprised to find them appealing. More than appealing, actually: delicious. Like most root veggies, their starches roast up into a sweet, tender bite that only needs the slightest encouragement from some fat (olive oil, in this case) and natural sweetener like maple syrup, to caramelize the outsides. If you like roasted carrots, give turnips a try too.

And what’s not to love? Besides a little peeling and chopping, it’s mostly just a bit of hands-off cooking time standing between you and a delicious and healthy-ish (we’re counting bacon as healthy, right? I presume yes?) one pan dinner. Plus, of course, there’s bacon.

Maple Roasted Turnips with Bacon and Crispy Shallots

PS: I made this recipe several times using Hakurei (white) turnips, but added some watermelon radishes to the final batch for variety and, I admit, visual interest. You can mix it up however you want, if you want, by mixing the turnips with radishes, carrots, or almost any other starchy root vegetable you can think of. Or you can follow the recipe and use all turnips, and it will still be delicious!

Maple Roasted Root Veggies with Bacon and Crispy Shallots
Print
Ingredients
  1. 2 Tablespoons extra virgin olive or coconut oil, divided
  2. 2/3 lb turnips, peeled and sliced
  3. 2 Tablespoons maple syrup
  4. Generous pinch sea salt
  5. 1 large (or 2 small) shallot(s), peeled and thinly sliced
  6. 1/4 lb good quality bacon (pork or turkey), chopped
  7. 1 Tablespoon roughly chopped fresh rosemary for finishing, or to taste
Instructions
  1. Preheat the oven to 400F. Add 1 Tablespoon of olive oil to a large oven-safe pan or baking dish (cast iron is best) and swirl it around to coat the bottom of the pan. Set aside.
  2. Place the prepared turnips in a large mixing bowl.
  3. In a small mixing bowl, whisk together 1 tablespoon of the oil, the maple syrup and the sea salt.
  4. Pour maple syrup mixture over the turnips and toss to coat.
  5. Transfer the turnips to the prepared pan, then sprinkle the shallots over the turnips.
  6. Bake for 15-20 minutes, then add the bacon and toss to combine all of the ingredients in the pan.
  7. Bake for another 20-30 minutes until turnips are soft and bacon and shallots are crispy.
  8. Remove from oven, sprinkle with fresh rosemary, and serve immediately.
Notes
  1. Store leftovers in an airtight container in the refrigerator for up to 3 days.
  2. Leftovers make an excellent breakfast, especially topped with a fried or poached egg.
  3. I made this recipe several times using Hakurei (white) turnips, but added some watermelon radishes to the final batch for variety and, I admit, visual interest. You can mix it up however you want, if you want, by mixing the turnips with radishes, carrots, or almost any other starchy root vegetable you can think of. Or you can follow the recipe and use all turnips, and it will still be delicious!
  4. Yield: Approximately 4 servings, but it all depends on how hungry you are.
A Clean Bake http://acleanbake.com/
Maple Roasted Turnips with Bacon and Crispy Shallots

Maple Roasted Turnips with Bacon and Crispy Shallots (Gluten free, Grain Free, Paleo and Naturally Sweetened)

The post Maple Roasted Turnips with Bacon and Crispy Shallots appeared first on A Clean Bake.

Creamy Pumpkin Sage Soup

$
0
0

Rich and creamy pumpkin sage soup is exactly what you need to get through the last freezing days of winter!

Creamy Dairy Free and Paleo Pumpkin Sage Soup

How was your weekend? It was crazy warm here. Not warm-warm. Not warm like Mexico warm (my family facetime’d me from Mexico wearing shorts and it made me very jealous), but definitely very Chicago-in-February warm. Yesterday, I even got to go for a walk/run (more walk than run, I’ll admit) along the lake. Since basically anything short of this is considered balmy this time of year, well, I’ll take it.

Today, it’s back to the grind. I’m in the office and the forecast calls for snow and cold allllll day. Yeah, it’s soup weather. And none of that amateur-hour brothy, light, precedes-the-meal kind of soup. More like rich, creamy and smooth, stick-to-your-ribs (but not weigh-you-down) soup swirled with something warm and flavorful.

February-in-Chicago soup. 

Creamy Dairy Free and Paleo Pumpkin Sage Soup

It’s every year around this time when I question my sanity in a way that only a warm weather person in a cold weather climate can. How did I end up here? Why did I not move to Bora Bora when I had the chance (oh, right, because I never had the chance.)? Will spring ever come?

In between such existential crises, I take comfort in a bowl of soup. And after xx [number redacted to protect the carefully-crafted illusion that I’m not super old] years living here, you’re either frozen to death, or you’re very well-acquainted with soup. Maybe… too much? After you’ve gotten sick of the old standbys, it’s time to get creative. 

This soup calls for canned or frozen pumpkin puree (but you can also sub any squash puree, like butternut or acorn), simple pantry spices and fresh or frozen sage. I only buy sage a couple times a year, and then I freeze it (you recall that heartier herbs like rosemary and sage freeze well, don’t you?) and pull out each piece as I need it. Anyway, puree the whole thing in a high speed blender, and you’ll have a comforting dinner tonight, plus leftovers to get you through the rest of the week without turning into an icicle. 

Creamy Pumpkin Sage Soup
Print
Ingredients
  1. 2 Tablespoons extra virgin olive oil
  2. 1 large white onion (about 2 cups sliced)
  3. 2 1/2 - 3 cups vegetable or chicken stock
  4. 6 cups fresh, frozen or canned pumpkin (or other starchy squash) puree
  5. 2 Tablespoons (tightly packed) fresh or frozen sage leaves
  6. 1 1/2 teaspoons coarse salt, or to taste (omit if using stock with salt added)
  7. 1 teaspoon black pepper, or to taste
  8. 1 teaspoon chili powder
  9. 1/2 teaspoon lemon juice
  10. 1/2 teaspoon granulated garlic
Instructions
  1. In a large dutch oven or stock pot, preheat the olive oil, then add the onion and sautee until translucent.
  2. Add 2 cups chicken stock, pumpkin puree, sage, salt, pepper, chili powder, lemon juice, and garlic. Stir to combine, then reduce heat and simmer for 10-15 minutes until the flavors combine and mellow a little bit.
  3. Carefully transfer the soup into a high speed blender and puree until completely smooth (make sure there are no pieces of sage leaf left!), adding an additional 1/2 - 1 cup stock as needed to keep the blender moving and thin the soup to your preference. Don't overload your blender; you may need to do this in a few batches.
  4. Taste and adjust seasonings to your preference before serving.
Notes
  1. Yield: 9-10 cups
  2. Store leftovers, cooled completely, in an airtight container in the refrigerator for up to a week, or in the freezer for up to three months.
A Clean Bake http://acleanbake.com/

Creamy Dairy Free and Paleo Pumpkin Sage Soup

This post contains affiliate links, which means that if you click through and purchase a product, A Clean Bake receives a small commission, which goes toward continuing to bring you delicious, healthy recipes every week. This does not affect the price you pay. Thanks for supporting A Clean Bake!

Creamy Dairy Free and Paleo Pumpkin Sage Soup

The post Creamy Pumpkin Sage Soup appeared first on A Clean Bake.

Green Meatballs

$
0
0

These fat, moist meatballs pack a huge serving of veggies in every bite! (gluten free, grain free, paleo and Whole30 compliant)

I’ve never been one for green beer (or really any beer), and I’ve seen the Chicago River dyed green enough times in my life that it has lost its novelty completely and sort of skeeves me out, actually. I’m not Irish, and I always forget about St. Patrick’s Day until Pinterest blows up with neon green-hued concoctions. And yet, sucker-for-a-good-theme that I am, I always fall prey to it, year after year.

Last year, and the year before I made gluten free and grain free Irish soda breads, respectively, and this year I was going to make a green cookie for you but and given how much cake I’ve eaten in the last couple of weeks while testing the birthday cake (<–have you seen this cake and the giveaway???), I had to give myself a break. My tolerance for sweets isn’t what it used to be. I think it’s  just another unmistakable symptom that I’m getting old. Does anyone else feel perpetually 22? Or maybe 17?

These fat, moist meatballs pack a huge serving of veggies in every bite! (gluten free, grain free, paleo and Whole30 compliant)

The theme of this past weekend was, apparently, the universe reminding me that I’m not 17 anymore. For example, on Saturday, my husband and I went to see my favorite band of all time, and were somewhat dismayed (to say the last) to find that literally everyone around us was either a middle school student or the parent/chaperone of one.

I was willing to overlook that (since most of them were taller than me anyway), but when the band broke into a song off of their very first album, which came out [redacted] years ago, and the entire arena went from jumping up and down and screaming to … eerily quiet and still … except me – I continued jumping and screaming because YOLO and also because I don’t believe “wife acted like fool at concert” is legal grounds for divorce (at least I hope not) – it was at that moment that I truly realized a) how old I am  b) how kids these days don’t do their homework (listen to the older albums before declaring your SuperFan status, please) and c) how anyone who uses the phrase “kids these days” should probably have not been allowed to attend a rock-music-related event. 

So, anyway, between the aforementioned jumping and screaming,  the uber-late bedtime, and the lost hour of sleep (damn you, inconveniently scheduled end-of-daylight-savings-time) by the time Sunday rolled around, neither of us was up for anything even resembling a St. Patrick’s Day festivity, nor anything green that didn’t pack a serious nutritional punch. Our bodies needed it.

These fat, moist meatballs pack a huge serving of veggies in every bite! (gluten free, grain free, paleo and Whole30 compliant)

Calling these green meatballs may be a misnomer because, unless you bake them (I wouldn’t – they dry out), they don’t end up looking very green at first glance, but I promise you, they are packed with green-caliber flavor and nutrition. There is an entire bunch of chard in the batch of meatballs, plus some mint and some feta, too, if not for greenness, then the accentuate the other, greener flavors.

I served these balls with garlic zoodles,  which are zucchini noodles, sauteed with olive oil, salt, pepper and granulated garlic, then covered to steam for a few minutes until tender. It’s so easy even a sleep-deprived senior citizen with fried vocal chords like me on Sunday night can do it.

Green Meatballs
Print
Ingredients
  1. 1 bunch chard (~ 1/2 lb), washed and stems discarded
  2. 1/2 cup (tightly packed) fresh mint leaves
  3. 1/4 teaspoon granulated garlic
  4. 2 teaspoons dried oregano
  5. 1 large egg
  6. 3 Tablespoons almond flour
  7. 4 ounces finely crumbled feta cheese
  8. 1 lb ground turkey (not too lean)
  9. Olive oil for frying
Instructions
  1. In the bowl of a food processor fitted with the "s" blade, process the chard and mint until very finely chopped. Add the garlic, oregano, and egg and pulse a few times until combined.
  2. Transfer the mixture to a large mixing bowl and add the feta and turkey. Use a spoon or your hands to mix very well until it reaches a uniform texture. Use an ice cream scoop to portion the meat mixture and roll each portion between your palms to form a tight ball. Repeat until all of the meat mixture is rolled into balls.
  3. Preheat a heavy bottomed pan over high heat. Add enough oil to generously cover the entire base of the pan and wait a moment for the oil to heat up. Add the meatballs, leaving at least an inch between them (note: if the first meatball does not immediately start to sizzle when you put it in the pan, remove it and let the oil heat up for a little longer).
  4. Cook for 2-3 minutes until a crust has formed on the bottom of each meatball, then flip and cook until the other side has turned deep brown and a crust has formed.
  5. Reduce the head to medium/med-high, cover and cook for 5-8 minutes, or until meatballs are cooked through (firm and slightly springy when you press down on them).
  6. Cover a large dinner plate with 2-3 layers of paper towels, and transfer the meatballs to the prepared plate to drain excess oil from them before serving.
Notes
  1. You can use beef, pork or a combination of both if you want, instead of the turkey.
  2. Yield: 12-15 meatballs
  3. Store leftovers in an airtight container in the refrigerator for up to 5 days.
A Clean Bake http://acleanbake.com/
These fat, moist meatballs pack a huge serving of veggies in every bite! (gluten free, grain free, paleo and Whole30 compliant)

These fat, moist meatballs pack a huge serving of veggies in every bite! (gluten free, grain free, paleo and Whole30 compliant)

The post Green Meatballs appeared first on A Clean Bake.

Homemade Pad Thai

$
0
0

Homemade Pad Thai (gluten free, dairy free)

If you haven’t already, go ahead and cancel your dinner plans. That’s right, go ahead. I’ll wait. This homemade pad Thai is SO much better than whatever you had in your meal plan. A number of you who answered the reader survey (if you haven’t yet, it’s not too late! Your responses are always helpful!) have requested DIY versions of takeout and/or Asian dishes, so I knew you’d like this one. I’ve made it approximately one million times (ok, ok, give or take a few… I had to leave a few shrimp in the ocean) and it never gets old. 

Even if you don’t think you like Thai food, give this dish a shot. The benefit of DIYing a dish you usually order is that you can make it however you like it: dial down the oil/dial up the spice/load on the veggies/whatever floats your boat.

Homemade Pad Thai (gluten free, dairy free)

The most challenging part of this recipe is the grocery shopping or, as I’ve fondly begun to refer to it, the ingredient-hunting. It can be a little tedious to find a few of the ingredients, so plan accordingly. The trickiest one to find is tamarind paste (which is really more of a syrup than a paste – go figure). I checked a million stores, and was finally able to find de Siam brand paste at a local European market. Supermarkets may have it in the “ethic foods” aisle, near the Asian condiments, and you can also order it online. The only other unusual ingredients that this recipe calls  for are fish sauce, rice vinegar and chili paste, all of which should be available in the Asian foods section of major supermarkets. Of course, you can get all of this at most southeast Asian (Thai, Vietnamese, etc) markets, if you happen to have one nearby, too.

Homemade Pad Thai (gluten free, dairy free)

The recipe is long. Just be prepared! However, it’s not complicated at all. It just requires a little bit of prep. Actually, total prep. I’ve been trying to help Bryan (my husband) learn how to cook, and the #1 rule that I am drilling into his head is to have all of his ingredients fully prepped and ready to go* before he is allowed to so much as pick up a skillet. Anyway, it’s good rule of thumb for all of us to follow, and as long as you have your sauce mixed and all of the other ingredients washed, chopped as measured, this recipe will be a breeze. Oh! And at the risk of sounding like a total dictator, one more thing: I have to insist that you read the recipe through entirely before you start, so you know what’s coming. As with most stir-friend Asian dishes, this one moves fast, and there’s no time to catch up.

*In fancier kitchens, they call this mis en place, which is French for “everything put in its  place”; in our house we call it pourquoi n’est rien prepare!?!?!?  (excessive punctuation mandatory), which is (me barking in bad) French for “WHY IS NOTHING PREPPED!?!?”.

Homemade Pad Thai (gluten free, dairy free)

The silver lining is that all of the time is in the prep, so you can do a lot of this ahead of time. The cooking process takes…. ehhhh.. maybe 15 minutes? So, if you prep the night before, you can totally pull this off on a weeknight. Or, better yet, make it Sunday night and have the sexiest lunch in the office on Monday 😉 

Homemade Pad Thai
Print
Ingredients
  1. 7 ounces thin rice noodles (spaghetti-size, not angel-hair size)
  2. 5 Tablespoons sesame oil, divided
  3. 2 Tablespoons tamarind paste
  4. 3 Tablespoons fish sauce
  5. 1-2 Tablespoons honey (to taste)
  6. 2 Tablespoons rice vinegar
  7. 1 teaspoon red chili paste (e.g. Sambal Oelek), divided
  8. 1 teaspoon minced garlic, divided
  9. 1/2 Tablespoon fresh lime juice
  10. .75 lb shrimp, washed, peeled and deveined (tails on or off)
  11. 3 large eggs, beaten
  12. 1 cup shredded carrots
  13. 1 cup snow peas, chopped
  14. 1 large red bell pepper, cut into thin strips
  15. 2-3 scallions, washed and chopped (for serving)
  16. Cashews, raw or toasted in a dry pan (for serving)
  17. Bean sprouts (for serving)
  18. Cilantro or Thai basil (or serving)
  19. Lime wedges (for serving)
Instructions
  1. Place the rice noodles in a large, heatproof mixing bowl. Cover with boiling water and soften until al dente, about 5 minutes. Drain and toss with 1 Tablespoon of sesame oil. Set aside.
  2. Make the sauce by whisking together the tamarind paste, fish sauce, honey, rice vinegar, 1 Tablespoon sesame oil, 1/2 teaspoon chili paste, 1/2 teaspoon garlic and lime juice in a small bowl until combined. Set aside.
  3. Preheat a large skillet or wok and add 1 Tablespoon sesame oil. When the oil is hot, add the remaining 1/2 teaspoon garlic and sautee briefly. Then add the shrimp and remaining 1/2 teaspoon chili paste. Sautee until cooked through. Transfer from the pan to a bowl and toss with 1-2 Tablespoons of the prepared sauce.
  4. Add the remaining 2 Tablespoons sesame oil to the pan.
  5. When the oil is hot, add the eggs, and scramble until about half cooked (soft and runny).
  6. Add the carrots, snow peas and red pepper and toss to combine.
  7. Add the noodles and the remaining sauce. Toss to distribute everything, then cover and allow to steam for 3-5 minutes, until the veggies are tender and the noodles are softened.
  8. Add the shrimp and its sauce into the pan and toss with the noodles and vegetables.
  9. Serve immediately, topped with generous handfuls of scallions, cashews, bean sprouts, Thai basil and several lime wedges. Squeeze the lime wedges over the noodles before digging in.
Notes
  1. Adapted from The New York Times.
A Clean Bake http://acleanbake.com/
 

Homemade Pad Thai (gluten free, dairy free)

Thank you to Now Foods for providing the ingredients that inspired this delicious recipe. This post contains affiliate links, which means that if you click through and purchase a product, A Clean Bake receives a small commission, which goes toward continuing to bring you delicious, healthy recipes every week. This does not affect the price you pay. Thanks for supporting A Clean Bake!

The post Homemade Pad Thai appeared first on A Clean Bake.

Carrot Orange Bread

$
0
0

Carrot Orange Bread (gluten free, grain free, lower carb and naturally sweetened)

I can personally attest to the fact that this carrot orange bread is killer. It’s awesome fresh out of the oven, it’s a winner for breakfast, and it’s an absolute gem topped with  almond butter and dark chocolate chips. But don’t take my  word for it: take my experience eating nine loaves of this for it. Yeah, this bread and I, we’ve very well acquainted. Although I wouldn’t recommend making nine loaves in the span of, like, 2 weeks or so, you can rest assured that the pleasantly sweet flavor of this bread doesn’t get old easily. Or at all, as far as I can tell.

Carrot Orange Bread (gluten free, grain free, lower carb and naturally sweetened)

Carrot Orange Bread (gluten free, grain free, lower carb and naturally sweetened)
I don’t want to overstate this but it’s kind of a big deal. See, usually, by the time I have made a dessert frequently enough to get it just right, I am so sick of it. But I have been eating this bread like it’s going out of style. Sorry, family, friends, neighbors and coworkers; this one’s all mine.

Carrot Orange Bread (gluten free, grain free, lower carb and naturally sweetened)

I’d love to tell you that this bread was inspired by something profound and interesting, but honestly, the only reason I made it at first was to use up some of the huge box of clementines I bought just because they still had their leaves attached and I am an easy target. Oh, Trader Joe’s, you tricky minx. The carrots serve two purposes: first, I really like carrot cake this time of year, and second, if you put vegetables in cake, you can call it bread and eat it for breakfast. I mean, everyone knows that, right?

Carrot Orange Bread
Print
Ingredients
  1. 2 cups blanched almond flour
  2. 5 Tablespoons (1/4 cup + 1 Tablespoon coconut flour)
  3. 1/4 cup granulated monk fruit sweetener (like Norbu) or granulated stevia (like Natvia)
  4. 1 teaspoon cinnamon
  5. 1 1/2 teaspoons baking soda
  6. 1/4 teaspoon fine sea salt
  7. 2 large eggs
  8. 1 cup orange juice (fresh is best)
  9. 2 Tablespoons (lightly packed) orange zest
  10. 1 cup shredded carrots
Instructions
  1. Preheat the oven to 350F. Lightly grease an 8.5" loaf pan and set aside.
  2. In a medium mixing bowl, whisk together the almond flour, coconut flour, sweetener, cinnamon, baking soda and salt and set aside.
  3. In a large mixing bowl, whisk the eggs, then whisk in the orange juice and zest. Add the dry mixture (flours, salt, etc) and whisk until thoroughly combined and no clumps remain. Don't forget to scrape the sides of the bowl to make sure you have everything well incorporated.
  4. Pour the batter into the prepared pan.
  5. Bake for 30 minutes, then tent with tinfoil and bake for another 30-40 minutes until a tester comes out mostly clean (a few small crumbs are ok).
Notes
  1. Store leftovers in an airtight container in the fridge for up to a week, or in the freezer for up to three months.
  2. Yield: One loaf of bread.
A Clean Bake http://acleanbake.com/

Carrot Orange Bread (gluten free, grain free, lower carb and naturally sweetened)

Thank you to Natvia for providing the ingredients that inspired this delicious recipe. This post contains affiliate links, which means that if you click through and purchase a product, A Clean Bake receives a small commission, which goes toward continuing to bring you delicious, healthy recipes every week. This does not affect the price you pay. Thanks for supporting A Clean Bake!

The post Carrot Orange Bread appeared first on A Clean Bake.

Jerk Salmon with Radicchio Blueberry Slaw and Sherry Vinaigrette

$
0
0

Jerk Salmon with Radicchio Blueberry Slaw and Sherry Vinaigrette (gluten free, low carb, paleo)

I’ll bet you were wondering why I posted nothing but that simple spice mix on Tuesday, because what do I do with a jar of mixed spices? Nah, just kidding. I know you guys are way more competent than that. What have you made (or do you plan to make) with it?

I’m all for encrusting a few chicken breasts and thighs with it and throwing it on the grill – you can’t go wrong with a classic – but if you’re looking for something a little bit more off-the-beaten-path and a little bit less requires-you-to-grill-outside-in-the-April-snow-as-though-that’s-a-totally-normal-form-of-precipitation, salmon takes remarkably well to jerk season like a fish takes to… um. (I want to say water, but really the answer here is jerk seasoning. I mean, obviously!)

Jerk Salmon with Radicchio Blueberry Slaw and Sherry Vinaigrette (gluten free, low carb, paleo)
Before you make a decision about this recipe, let me first address the elephant in the room: I realize this ingredient list is as long as the recipe title is eye-rollingly shmancy, but if you let either of those factors influence your decision, you’re missing out on something spectacular. Sure, you could certainly make a huge batch of this and just absolutely kill it at your next dinner party, but around here, we have had this meal a few times for dinner – and the leftovers make a really great lunch. I’ll bet you knew I was going to say that, because I always say that. Well, it’s true!

Jerk Salmon with Radicchio Blueberry Slaw and Sherry Vinaigrette (gluten free, low carb, paleo)

The salmon, for one, stays juicy and flavorful whether it’s right out of the oven, or has been in the fridge since last night’s dinner. I under cook mine slightly so that it is medium rare, but you can certainly leave it in the oven a little longer to get that firmer, flakier consistency (I guess you’d call it well done? I have no idea how to apply those terms to fish. Let’s just call it “cooked through” so we’re all on the same page.)

The slaw, not to be outdone, is also a rockstar when it comes to sustaining its crisp texture and fresh flavor, even over the course of a few days. I have been really enjoying eating the slaw for lunch with different protein options, so feel free to either make half of the salmon component or double the slaw. Then, to mix it up for lunch, try adding feta, cashews, edamame (if you eat soy), or sliced grilled chicken. If I were the kind of blogger that said things like “it’s a real workhorse of a recipe”, I’d say this is a real workhorse of a recipe.

Jerk Salmon with Radicchio Blueberry Slaw and Sherry Vinaigrette (gluten free, low carb, paleo)

And the dressing. Oh, the dressing! If you’re not as heavy handed as I am when dressing your salads, you might have some left over, and trust me, you’ll thank yourself for your parsimonious – or, in a rare case of Having Your Cake And Eating It Too, you could just make more.

So, the big secret a bout this recipe is this: what appears to be one irritatingly high maintenance recipe is actually three – well four, counting the spice mix – totally manageable recipes in disguise. And if you want in on an even bigger secret, I’ve made this entire meal multiple times on a weeknight, so it’s completely doable and not at all very high maintenance.

Jerk Salmon with Radicchio Blueberry Slaw and Sherry Vinaigrette
Print
Ingredients for the salmon
  1. 4 salmon fillets (approx. 8 ounces each, before cooking), skin on
  2. Extra virgin olive oil
  3. 2 Tablespoons jerk seasoning
Ingredients for the slaw
  1. 1 head of radicchio, exterior leaves and core removed, thinly sliced
  2. 2 (firmly packed) cups baby arugula
  3. 1/2 cup (loosely packed) fresh mint leaves, thinly sliced
  4. 1/2 cup crumbled feta
  5. 2 cups fresh blueberries, rinsed and dried
Ingredients for the dressing
  1. 1/4 cup sherry vinegar
  2. 1/4 cup fresh orange juice
  3. 2 Tablespoons olive oil
  4. 2 teaspoons honey
  5. 1 teaspoon minced garlic
  6. Salt and pepper to taste
For serving
  1. Lemon or lime slices or wedges
Instructions
  1. Preheat the oven to 325F. Grease a baking pan and place the salmon about 2" apart on the pan, skin side down. Sprinkle each fillet with 1/2 Tablespoon of jerk seasoning and bake for 15-20 minutes (15 for a more medium/medium-rare fillet, 20 for a more well-done fillet).
  2. While the salmon is cooking, prepare the slaw and the dressing. For the slaw, toss together everything but the blueberries, then sprinkle the blueberries over the top. For the dressing, whisk together all of the ingredients or add them all to a small container or jar with an airtight top, close and shake vigorously.
  3. If you're going to eat the meal immediately, toss the dressing with the slaw. If you plan to save some for leftovers, I recommend dressing each portion of slaw separately. Top a generous (dressed) portion of slaw with a salmon fillet, garnish with lemon or lime, and serve.
Notes
  1. Store the salmon (cooled) and the slaw (undressed) in separate airtight containers in the fridge for up to 3 days. Store the dressing in an airtight container at room temperature for up to a week, or in the fridge for 2-3 weeks.
  2. Yield: Four dinner portions.
A Clean Bake http://acleanbake.com/
Jerk Salmon with Radicchio Blueberry Slaw and Sherry Vinaigrette (gluten free, low carb, paleo)

The post Jerk Salmon with Radicchio Blueberry Slaw and Sherry Vinaigrette appeared first on A Clean Bake.

Chocolate Chunk Zucchini Bread (Grain Free, Dairy Free, Paleo)

$
0
0

Chocolate Chunk Zucchini Bread (Gluten free, paleo, lower carb, dairy free)

I’m not sure at what point I shifted from cooking for myself and sharing with you to cooking for you, like a virtual dinner (dessert) party,  but I certainly don’t mind. I’d love to have you over for a real-world dinner party, but since my house currently lacks a dining room table, and it would be a little awkward of us to eat standing at the kitchen counter or sitting on the couch, a virtual one is the next best thing.

Anyway, this is one of those recipes that fell into the category of “I really want to make this for everyone”, rather than “I’m in the mood for ___” – only, I started working on it last summer, and gave up after too many failed loaves and the end of zucchini season basically forced me to, only to pick it up again this year as soon as those weedy vines started yielding so many squash that stores have no choice but to practically give it away. A long time ago, I convinced myself that I have to make you zucchini break and so, approximately 900 attempts later, we have zucchini bread.

Chocolate Chunk Zucchini Bread (Gluten free, paleo, lower carb, dairy free)

As for why it took so long, well, that’s on me. I thought it would be simple. Just slightly adapt the banana bread recipe to include, well, zucchini instead of bananas and cha-ching! Perfect zucchini bread. That’s… uh… not how it works, and especially not when it comes to either watery vegetables or grain-free baking, and certainly not when the two factors are combined.

Chocolate Chunk Zucchini Bread (Gluten free, paleo, lower carb, dairy free)

But I had already made up my mind: I was making you zucchini bread come hell or high water (…content in the batter) so I tweaked this and adjusted that and maybe also added that other thing, and made a billion more loaves until it was finally right. And it is so, so right: the bread is moist, dense and studded with specks of vibrant green that remind you that you’re technically eating your vegetables, so you’d better have another slice. Never mind that they are  interspersed with thick gobs of chocolate that refuse to adopt any consistency but the perfect degree of meltiness (the current heat index is, as it turns out,  good for some things).

Chocolate Chunk Zucchini Bread (Gluten free, paleo, lower carb, dairy free)

At this point, thoroughly convinced by the perfectly melt-y chocolate chunks, I admit, perhaps my motivation for this recipe everrrr so slightly shifted from wanting to make you a loaf of chocolate chunk zucchini bread to wanting to make us a loaf of chocolate chunk zucchini bread. But don’t worry: there’s more than enough to go around!

Chocolate Chunk Zucchini Bread
Print
Ingredients
  1. 4 large eggs
  2. 1/4 cup mild oil (like virgin coconut, canola or grapeseed)
  3. 2 teaspoons vanilla extract
  4. 1 teaspoon white or apple cider vinegar
  5. 2 1/2 cups shredded fresh zucchini, measured lightly packed
  6. 3/4 cup blanched almond flour
  7. 1/4 cup + 2 Tablespoons coconut flour
  8. 1/4 cup tapioca flour
  9. 1/2 cup granulated monk fruit sweetener (like Norbu) or granulated stevia (like Natvia)
  10. 2 teaspoons cinnamon
  11. 3/4 teaspoons baking soda
  12. 1/2 teaspoon fine sea salt
  13. 3/4 cups dark chocolate chunks, plus more for garnish
Instructions
  1. Preheat the oven to 350F. Grease or spray an 8.5" loaf pan and set aside.
  2. In a large mixing bowl, whisk the eggs, then whisk in the oil, vanilla, and vinegar.
  3. Stir in the shredded zucchini, then set aside.
  4. In a medium mixing bowl, whisk together the almond flour, coconut flour, tapioca flour, sweetener, cinnamon, baking soda and salt.
  5. Add the dry mixture to the wet mixture and whisk thoroughly to combine. Fold in the chocolate chunks.
  6. Pour the batter into the prepared loaf pan and smooth into an even layer.
  7. Bake for 70-80 minutes until the top is golden brown and firm to the touch, and a tester comes out relatively clean (there may be a few small crumbs and some gooey chocolate on it, but that's ok).
  8. Cool for 15-30 minutes in the pan before turning out onto a rack to cool completely.
Notes
  1. Use dairy free chocolate chunks if necessary.
  2. If you'd like to make these in mini loaf pans, you'll need 4, and they will bake for around 45 minutes.
  3. Store leftovers in an airtight container at room temperature for up to 3 days, or in the freezer, wrapped tightly, for up to 3 months.
  4. Yield: One 8.5" loaf
A Clean Bake http://acleanbake.com/


Chocolate Chunk Zucchini Bread (Gluten free, paleo, lower carb, dairy free)
Thank you to Natvia for providing the ingredients that inspired this delicious recipe. This post contains affiliate links, which means that if you click through and purchase a product, A Clean Bake receives a small commission, which goes toward continuing to bring you delicious, healthy recipes every week. This does not affect the price you pay. Thanks for supporting A Clean Bake!

The post Chocolate Chunk Zucchini Bread (Grain Free, Dairy Free, Paleo) appeared first on A Clean Bake.


Zucchini Apple Banana Muffins (plus a Simple Mills Giveaway!)

$
0
0

Grain Free and Naturally Sweetened Zucchini Apple Banana Muffins #BacktoSimple #HealthySnacking

I’m desperately searching for inspiration about how to tell you about these muffins and  I’m having the toughest time.

They’re so simple, yet so incredible.

They’re so (seemingly) nondescript, but so moist, flavorful, and bursting with fresh, vibrant fruit and veggie flavors.

They’re the perfect back to school snack. And they’re the perfect snack to celebrate my last year of not having to worry about back to school (or having to worry about worrying about back to school). 

They’re so easy that it would be a crime not to make them asap. 

Grab and bowl and a spoon and let’s get started.

Grain Free and Naturally Sweetened Zucchini Apple Banana Muffins #BacktoSimple #HealthySnacking

The easiest part about these is that the base is….a mix. WAIT. Hear me out. You know I don’t mess around when it comes to ingredients, so I used a Simple Mills banana bread and muffin mix (which the above picture probably gave away) as the base for these muffins because we have been juggling a lot this summer in my house, but that doesn’t alleviate the need for muffins in the slightest. Talk to me about maximizing the efficiency with which I can get a muffin from the bowl to the oven to my mouth, and I’ll talk to you about Simple Mills

If you’re not familiar with this brand, you must be new here (welcome!) because I have worked with them for a long time and never stop loving their products. Forget the taste (which is, incidentally, outstanding), and instead consider the guts of the brand: simple, natural, real food ingredients that you know, love and can pronounce. I’m not big on endorsing a lot of products on this site, but you can tell from the number of times I’ve used Simple Mills products in a recipe that I can’t live without this brand. I have a feeling that I’ll be relying on it even more frequently as soon as Baby Bake arrives and puts my current state of busy-ness, sleep deprivation and multitasking to shame.  

Grain Free and Naturally Sweetened Zucchini Apple Banana Muffins #BacktoSimple #HealthySnacking

Speaking of which, whether or not you are sending anyone back to school in the next couple of weeks (or did already? Have some schools already started?), these muffins give you no excuse to skip  a healthy snack. They’re high in protein and healthy fat, lower carb and packed with nutritious, fiber-rich fruits and veggies so they are the perfect antidote to the 3pm slump. Or, if you’re me, the 9:45am slump, at which point I either need to eat something or go back to bed for the rest of the day.

I’m not exaggerating when I say that healthy, low-glycemic snacks like these muffins are saving my life, or at least  my productivity and focus, every day and without them I wouldn’t be able to make it through even half of the day. Who else could use a little pick me up?

If you’re raising your hand right now, let me make it even easier for you! I’m giving away a box of the Simple Mills banana muffin mix so that you can make these muffins asap, and I’m even throwing in a box of Simple Mill’s new Fine Ground Sea Salt Crackers (<– actual crackers that you can eat out of the box, no baking required. Don’t you miss that?!) All you have to do to enter is leave me a comment below telling me about one awesome, unusual or otherwise memorable thing you did this summer. I’ll randomly pick a winner on Friday (8/26) so let me know soon! The contest is now closed! Thank you to all who left me messages below.  Your summer plans sound amazing!!

Zucchini Apple Banana Muffins
Print
Ingredients
  1. 2 large eggs, beaten
  2. 2 Tablespoons grapeseed or other mild oil
  3. ½ cup shredded zucchini
  4. ½ cup shredded apple (Fuji or similar variety is recommended; skin on or off is ok)
  5. ½ cup water
  6. ½ teaspoon pumpkin pie spice
  7. 1 box Simple Mills banana muffin mix
Instructions
  1. Preheat the oven to 350F. Line 9 compartments of a 12-cup standard muffin tin with papers, or coat thoroughly with oil or nonstick spray. Set aside.
  2. In a large mixing bowl, whisk together the eggs and oil, then add the zucchini and apple and mix to combine.
  3. Stir in the water.
  4. Stir in the pumpkin pie spice, then the Simple Mills mix. Stir until combined, but do not overmix.
  5. Use an ice cream scoop or large spoon to divide the batter between the 9 prepared muffin compartments.
  6. Bake for 30-35 minutes, until the muffins are domed, golden brown, and firm and springy to the touch.
  7. Cool before serving.
Notes
  1. If you don’t have pumpkin pie spice on hand, you can replace it with cinnamon.
  2. Store leftovers in an airtight container in the fridge for up to a week. These will also freeze well, tightly wrapped, for up to 3 months.
  3. Yield: 9 muffins
A Clean Bake http://acleanbake.com/

Grain Free and Naturally Sweetened Zucchini Apple Banana Muffins #BacktoSimple #HealthySnacking

Thank you to Simple Mills for providing the ingredients that inspired this delicious recipe. I was compensated for the time I spent developing this recipe, but all opinions are my own. This post contains affiliate links, which means that if you click through and purchase a product, A Clean Bake receives a small commission, which goes toward continuing to bring you delicious, healthy recipes every week. This does not affect the price you pay. Thanks for supporting A Clean Bake!

The post Zucchini Apple Banana Muffins (plus a Simple Mills Giveaway!) appeared first on A Clean Bake.

Salmon Nicoise Salad

$
0
0

Salmon Salad Nicoise - Make all the components ahead of time for a quick and easy meal! (gluten free, grain free, and paleo friendly)

It wasn’t so much a moment, or even a day, but a gradual creep. Things – every day things, that I never used to think twice about – have gotten harder and more taxing little by little until one day I realized “oh shit. This is what everyone’s been talking about.”

I still don’t feel pregnant – at least not in any of the ways that I expected to, or that friends told me I would. I don’t feel an enormous dead weight hanging off the front of my body, I don’t have a ravenous appetite, and I’m not sweaty or experiencing rib pain all the time (yet). But I feel different. Possessed. Not like myself. Sometimes, alarmingly like the days in the past couple of years when I was sickest and struggling the most, and I have to remind myself that this time, it’s ok. This is not a backslide. This is a forward, um, slide. It is amazing to realize that my previously-broken body is now so unbroken that it is able to not just support my own existence but someone else’s. 

Salmon Salad Nicoise - Make all the components ahead of time for a quick and easy meal! (gluten free, grain free, and paleo friendly)

But still… that doesn’t help with the fatigue. It’s not “I didn’t sleep much last night” tired, which I’m used to and don’t even notice anymore, but “someone removed the bones from my body” tired. So, I’m starting to invent coping mechanisms. Meal planning is one of them, and I’m going to start posting our meal plans soon for those of you who have asked me over and over for the last couple years for more meal planning guidance, and batch cooking is another. This salad is a perfect way to put batch cooking to good use, and enjoy a healthy, satisfying meal (because this salad is a meal; it’s so loaded that you can’t even see the greens underneath. No rabbit food here!) without feeling like you’re eating old, lifeless leftovers.

See, everything in this nicoise salad is meant to be served cold, so who would know if you prepared the components an hour ago or 3 days ago? If you’re tired enough, you can even trick yourself into forgetting. Actually, you don’t even have to try; you’ll just be so thankful to see actual food in the fridge that you don’t have to prepare. 

Salmon Salad Nicoise - Make all the components ahead of time for a quick and easy meal! (gluten free, grain free, and paleo friendly)

The salmon can be made fresh, if you want, which is totally manageable with my super-quick, hands off seared salmon method. Sometimes, I even make several bowls of the salad base, with everything except the salmon, and put it in the fridge (covered, of course), until I’m ready to sear a piece of fish and plop it in the center of the action. And it is a bowl full of action: endlessly contrasting colors, textures and flavors that make every bite interesting and satisfying. This salad may be a desperation meal on your most tired or lazy day, but it certainly tastes like anything but. 

Salmon Nicoise Salad
Print
Ingredients for the salad
  1. Approx 6 cups mixed baby greens
  2. 1/4 lb grape tomatoes, rinsed and halved
  3. 3/4 lb white or white sweet potatoes, cut into bite-sized pieces, steamed or roasted, and chilled
  4. 1/4 cup green beans, steamed and chilled
  5. 2 hard boiled eggs, cooled, peeled and sliced
  6. About 10 nicoise or kalamata olives, halved
  7. 2 quick-seared salmon fillets (method here), hot or chilled
Ingredients for the lemon dijon vinaigrette
  1. 1/4 cup fresh lemon juice
  2. 2 Tablespoons extra virgin olive oil
  3. 2 Tablespoons dijon mustard
  4. 1 teaspoon honey (or more to taste)
  5. Salt and pepper to taste
Instructions
  1. Divide the greens between two large entree bowls.
  2. Add half of the tomatoes, potatoes, beans, eggs, and olives to each bowl.
  3. Top with salmon fillets.
  4. In a small bowl, whisk together the vinaigrette ingredients until well combined.
  5. Dress the salads with the vinaigrette, and serve immediately.
Notes
  1. You can make all of the components of this salad up to 3 days ahead of time and store them (individually) in airtight containers in the refrigerator until you're ready to assemble the salads.
  2. This salad was inspired by the salad of a similar name at Nordstrom Cafes.
  3. Yield: 2 salads
A Clean Bake http://acleanbake.com/

Salmon Salad Nicoise - Make all the components ahead of time for a quick and easy meal! (gluten free, grain free, and paleo friendly)

The post Salmon Nicoise Salad appeared first on A Clean Bake.

Acorn Squash Galette with Caramelized Onions and Thyme

$
0
0

Paleo-Acorn-Squash-Galette-With-Caramelized-Onions-And-Thyme

Look! I got my act together and made us a Thanksgiving recipe! Granted, it’s another side dish, but who doesn’t need another side dish idea the upcoming week for when you realize [insert way that things didn’t go to plan this week, as it never does for anyone every year]. No worries. I totally have you covered with this acorn squash galette. It tastes so fancy! But only takes a little while to make! Rustic imperfection is part of its charm! And you get the help of appliances to make it!

Paleo-Acorn-Squash-Galette-With-Caramelized-Onions-And-Thyme

Paleo-Acorn-Squash-Galette-With-Caramelized-Onions-And-Thyme

First, make the caramelized onions. But make them in your slow cooker, so you can go do other things while they’re caramelizing and you don’t have to wait around watching the oven. Also, make them in advance, since you can make a big batch and keep them in the fridge for awhile (up to 2 weeks, in my experience) or in the freezer for even longer (up to 2-3 months in an airtight container). So, that’s done.

Next, make the filling by roasting or steaming a small, peeled, seeded and sliced acorn squash (you can use butternut if you prefer; in order to quickly cook it, I peeled, seeded and sliced the squash and then quick-steamed it in a covered pan until soft) and toss it with the caramelized onions and seasonings. 

Finally, make the crust. All you have to do – and I mean this completely literally – is throw the ingredients, first dry, then wet, in a food processor and mix until a ball of dough forms. 

To assemble the galette, gather the dough in a ball, sandwich it between two pieces of wax or parchment paper and roll (or press) into a disc. Pour the filling into the center and fold the edges over to seal it all in (if you have any issues with the dough cracking, just wet your fingers and re-hydrate that part of the dough until you can seal the crack back together). Then brush with egg wash – which is an optional step, but helps with browning – and bake.

Paleo-Acorn-Squash-Galette-With-Caramelized-Onions-And-Thyme

I think it took me longer to type out the process than it did to actually carry it out. In case you don’t believe me that it really is that easy, you can see step-by-step pictures in this post. Or, better yet, you could try it for yourself and report back to me on how surprisingly low maintenance this savory acorn squash galette is to make, and how much credit you got to take for slaving away in the kitchen for “hours” leading up the Thanksgiving dinner. 😉

Acorn Squash Galette with Caramelized Onions and Thyme
Print
Ingredients for the filling
  1. One small acorn squash (about 2/3 lb), peeled, seeded and sliced, and cooked (steamed or roasted) until tender
  2. 1/2 cup caramelized onions
  3. 1 Tablespoon fresh thyme leaves
  4. 1/4 teaspoon fine sea salt
  5. 1/4 teaspoon freshly ground black pepper
Ingredients for the crust
  1. 1 1/2 cups blanched almond flour
  2. 1/4 cup + 2 Tablespoons coconut flour
  3. 2 Tablespoons fresh thyme leaves (loosely packed)
  4. Pinch salt
  5. 1/4 cup very cold butter, chopped into chunks (sub coconut oil, melted and cooled, for dairy free option)
  6. 2 Tablespoons very cold water or milk of choice
  7. 1 large egg white (about 2 Tablespoons)
Ingredients for finishing
  1. 1 large egg, beaten
  2. 1 Tablespoon milk of choice
Instructions
  1. Preheat the oven to 350F. Get out a baking sheet that is large enough to hold a piece of parchment, and set aside.
  2. Make the filling: In a large mixing bowl, gently fold together all of the filling ingredients until thoroughly combined. Set aside while you make the crust dough.
  3. Make the crust: In the bowl of a food processor fitted with the "s" blade, pulse the almond flour, coconut flour, thyme, salt and pepper together several times to combine. Add the butter (or coconut oil), and pulse several times until the butter pieces (if using) are the size of small peas. While the machine is on, pour in the milk and egg white and continue to process until the dough comes together in a large ball or mass.
  4. Scrape down the sides of the food processor bowl to make sure all of the dough is incorporated, and then turn out the dough ball onto a large sheet of parchment paper.
  5. Top with another sheet of parchment, and roll into a disc about 1/4" thick. Make sure the disc fits within the width of parchment and the parchment fits on your baking sheet. If you need to make the dough disc a little thicker to make sure it fits, do so.
  6. Grasp the parchment firmly on both sides and, applying enough tension to keep the parchment paper as flat as possible, transfer the dough disc (with the parchment) onto the waiting baking sheet.
  7. Add the filling to the center of the crust, leaving about 2" empty.
  8. Pick up one corner of the parchment and use it to fold the empty dough over the peaches. Then rotate a few inches and do the same again, folding the crust over the peaches (overlapping the first fold slightly). Continue to repeat this motion until the entire filling has been encased in the extra border of dough.
  9. Make the egg wash by whisking together the egg and milk. Brush the top and side of the galette dough (all exposed dough, NOT the filling), with egg wash.
  10. Bake for 30-40 minutes until the crust is firm and golden.
  11. Allow to cool on the baking sheet for at least 10 minutes before serving.
Notes
  1. You can replace the acorn squash with butternut if you prefer.
  2. In order to quickly cook the squash, peel, seed and slice it, then put the slices in a pan with about 1/2" of water, cover it, and cook, stirring occasionally, until softened.
  3. Tip for folding the dough: Using the parchment to fold helps minimize cracks but if your dough still cracks, just use your fingertips to gently smooth and reseal the crack. If that isn't working well, dip your finger in a small bowl of water before smoothing over the cracks. This will rehydrate the dough and allow it to form a seal again.
  4. This galette is best within a few hours of baking, but if you have leftovers, store them in an airtight container in the fridge for up to 3 days. Expect the crust to soften and get a little cake-ier with each day in the fridge.
  5. Yield: One galette/approx 6-8 slices
A Clean Bake http://acleanbake.com/


Paleo-Acorn-Squash-Galette-With-Caramelized-Onions-And-Thyme

The post Acorn Squash Galette with Caramelized Onions and Thyme appeared first on A Clean Bake.

Radish Greens Pesto

$
0
0

Radish-Greens-Pesto-Gluten-Free-Vegan-Paleo

There are plenty of pesto recipes on this site, sure, but this one is probably my favorite. Not necessarily because it tastes better than the others – they’re all good – but because I love the idea of repurposing something that would otherwise become trash. It’s like edible upcycling, if you will. Wait, I’m horribly uncool; is upcycling still a thing?

Just to be safe, let’s call it Turning Almost-Trash Into Something Delicious. I think we can get on board with that, right? 

Radish-Greens-Pesto-Gluten-Free-Vegan-Paleo

So, anyway, I am a firm believer that pesto can be made with almost any green leafy thing, and I think you should be too. And since we are coming up on prime radish season, I think we should do these under-appreciated subterranean gems the honor of using their greens just as deliciously as their bulbs (seeds? meat? what the heck do you call the radish part of the radish?). And the easiest way to use them is in radish greens pesto.

The greens are the component of the pesto formula, and the rest are things that you probably have in your pantry:

  • Nuts or seeds: instead of pricey pine nuts or sometimes-pricey walnuts, we’re using affordable pumpkin seeds here. I love NOW Foods’s raw, unsalted pumpkin seeds, and that’s what I use for this recipe.
  • Olive oil: Extra virgin please. A lot of the flavor shines through in this recipe, so use the best quality you have.
  • Salt, pepper and garlic: You already have these in your pantry. I even use granulated garlic instead of fresh to simplify, but if you want to use fresh (to taste) instead, feel free.
  • Traditionally, pesto has a hard cheese in it, but I leave it out of mine to keep it dairy free. Feel free to add cheese and reduce or eliminate the salt if you prefer.

Basically, this recipe boils down to getting two dishes out of a bunch of radishes, instead of one. What’s not to love?

Radish Greens Pesto

  • 2 bunches radish greens ((about 4 cups, packed))
  • 1/2 cup raw, unsalted pumpkin seeds
  • 1/4 cup extra virgin olive oil
  • 1 Tablespoon fresh lemon juice
  • 1.5 teaspoon granulated garlic
  • 3/4 teaspoon black pepper, (freshly ground)
  • 1/2 teaspoon fine sea salt
  • 1/4 cup water, (as needed)
  1. In the bowl of a food processor fitted with the s blade, pulse the radish greens and pumpkin seeds 10-20 times until finely chopped. 

  2. With the machine running, pour the olive oil in with the greens and seeds in a thin, continuous stream. 

  3. Stop the machine and scrape down the sides. Add the lemon juice, garlic, salt, and pepper, then process for 10-20 seconds until combined.

  4. With the machine still running, pour the water in, one Tablespoon at a time, until the pesto reaches your desired consistency. You may need more or less than 1/4 cup. 

  5. Serve immediately.

  • If you’re concerned about the pesto being too bitter, replace half of the radish greens with something milder like spinach, kale, or chard.
  • Store leftovers in an airtight container in the fridge for up to one week, or in the freezer for up to three months
  • Looking for ways to use the radishes that were attached to those greens? Try these fish taco bowls.

Radish-Greens-Pesto-Gluten-Free-Vegan-Paleo

Thank you to Now Foods for providing the ingredients that inspired this delicious recipe. This post contains affiliate links, which means that if you click through and purchase a product, A Clean Bake receives a small commission. All proceeds go toward continuing to bring you delicious, healthy recipes every week, and this does not affect the price you pay. Thanks for supporting A Clean Bake!

The post Radish Greens Pesto appeared first on A Clean Bake.

Paleo Orange Creamsicles

$
0
0

These paleo orange creamsicles use real orange juice to recreate a dairy free and naturally sweetened version of the childhood favorite!

Paleo-Orange-Creamsicles

It’s another one-post week, guys. I have had family visiting 3 weeks in a row now, which means less time for cooking and more excuses to go out for meals and sometimes that’s just… necessary. The weather is warming up and the sun is gracing us with its presence on a semi-regular basis, so who wants to be in the kitchen non stop? Who wants to crank up the oven when the weather is scorching? (Me. I do. Always. But hopefully you all have more sense than me.)

So I guess I made these paleo orange creamsicles for the same reason that I haven’t been blogging much: a break from the kitchen once in awhile is important. A break from cool, refreshing treats is never a good idea.

Paleo-Orange-Creamsicles

Sometimes, I worry that I get in a dessert rut when every idea I have ends in chocolate. When that happens, I think WWBWTE? That is, for those of you who aren’t in my warped little mind, “What Would Bryan Want To Eat”?

I’ve discussed before – ad nauseum, in fact – how different my husband’s preferences are from my own. He likes meat, I like vegetables and carbs. He likes fruit, I like chocolate. He likes creamy textures and buttery pastries, I like dense cookies and rich cake. He doesn’t even like sweets that much and when he does, he prefers store bought over homemade (though, because he’s a good husband, he’d never admit it). And he loves (LOVES) orange creamsicles, with their sugary interior and coating of a shade of orange that only exists in nature if you put a traffic cone in the middle of a forest.

Paleo-Orange-Creamsicles

I wish I could give you some cutesy diatribe about how I want to share a batch of popsicles with you but that would be a bold faced lie because they are gone. Long, long gone. Bryan devoured them, sometimes twice a day, and for someone who doesn’t actually love healthy homemade sweets, his excitement about these was, well, let’s say noteworthy.

So, I guess you could say they’re pretty good!

Orange Creamsicles

  • Juice and zest of 2 large oranges ((see note))
  • 1 cup unsweetened coconut milk ((full fat is best))
  • 1/4 cup maple syrup
  1. Stir together all ingredients until combined.

  2. Divide mixture between 6-8 popsicle molds. 

  3. Freeze until solid. 

  • If you prefer a stronger orange flavor and/or don’t have fresh oranges on hand, you an use 1 cup no-sigorange juice concentrate (defrosted)


Pin for later 👇

The post Paleo Orange Creamsicles appeared first on A Clean Bake.

Guacamole in the Food Processor

$
0
0

This easy from scratch guacamole is can be made in minutes using your food processor!

Guacamole Made In the Food Processor

This recipe is an another old one (as in: it’s been on the site before, but is now new and improved!), but does good guacamole that takes literally no – ok very little – effort ever really go out of style?

Nope, it doesn’t and especially not when summer picnic season is at its height.

Guacamole Made In the Food Processor

So, why does the internet need yet another guacamole recipe? Well, that’s a fair question. It is hardly a revelation to post a guacamole recipe at the time of year when people are gathered each weekend on someone’s back deck or patio, chips in hand, eagerly searching for a bowl of something to dip it in. I’m sure you’ve made guacamole 500 times before from 500 different recipes, including the one you made up on the spot.

But I can assure you that this recipes still deserves a place in your arsenal. Why? Because it’s easy. No, like really easy. Guacamole in and of itself isn’t the most complex of recipes, admittedly, but oh the monotony. The scooping, the chopping, blah blah. If there is an opportunity to make something even faster and easier, you know I’m all about it. And so is your food processor.

Guacamole Made In the Food Processor

That’s right: just roughly chop all of your ingredients so they’ll fit in the bowl, and pulse a few times for chunky guacamole, and a few more times for smooth. A few things to know about this guacamole:

  • Start with perfectly ripe avocados. Do you know the trick to determining the ripeness of an avocado? Pull off the stem and if the flesh underneath is green (and it feels tender when you squeeze it), it’s ripe. To ripen an avocado quickly, put it in a paper bag, fold the bag closed, and leave it on the counter in a warm kitchen. For even faster ripening, add a banana to the bag. Both fruits release ethylene gas, which speeds ripening. To prevent an avocado from ripening too quickly, put it in the fridge.
  • Choose sweet, flavorful tomatoes. This means selecting them at the peak of the season, ideally. And look for locally grown tomatoes, if possible Those which are shipped from far away are generally picked wayyyy before they are ripe (so that they don’t spoil in transit), and may either not be ripe or just be a mealy, flavorless mess by the time they make it to your kitchen. If you’re really at a loss for good tomatoes, don’t be afraid to use good quality canned chopped tomatoes instead of setting for bad fresh ones.
  • If you are not a fan of cilantro, use curly parsley instead.
  • If you like a lot of spice in your guacamole, leave some of the seeds in the jalapeno. If you don’t like spice, make sure you’ve removed all of the seeds, and you can even reduce the amount of the green flesh of the pepper that you put in the guacamole.

Easy From-Scratch Guacamole

  • 2 ripe avocados
  • 1 small red onion ((about 1/3 cup minced))
  • 2 roma tomatoes ((or 12 cherry tomatoes; about 1/2 cup diced))
  • 1 cup loosely packed cilantro leaves
  • Juice of 1 lime ((about 3-4 Tablespoons))
  • 1/2 jalapeno, (seeded and roughly chopped – leave a few seeds in for added spice)
  • 1.5 teaspoons salt, (or to taste)
  1. Combine all of the ingredients in the bowl of a food processor and pulse until chopped or smooth (whatever you prefer). 

  2. Taste and adjust seasonings to your preference.

  3. Serve immediately.
  • Start with perfectly ripe avocados. Do you know the trick to determining the ripeness of an avocado? Pull off the stem and if the flesh underneath is green (and it feels tender when you squeeze it), it’s ripe. To ripen an avocado quickly, put it in a paper bag, fold the bag closed, and leave it on the counter in a warm kitchen. For even faster ripening, add a banana to the bag. Both fruits release ethylene gas, which speeds ripening. To prevent an avocado from ripening too quickly, put it in the fridge. 
  • Choose sweet, flavorful tomatoes. This means selecting them at the peak of the season, ideally. And look for locally grown tomatoes, if possible Those which are shipped from far away are generally picked wayyyy before they are ripe (so that they don’t spoil in transit), and may either not be ripe or just be a mealy, flavorless mess by the time they make it to your kitchen. If you’re really at a loss for good tomatoes, don’t be afraid to use good quality canned chopped tomatoes instead of setting for bad fresh ones. 
  • If you are not a fan of cilantro, use curly parsley instead. 
  • If you like a lot of spice in your guacamole, leave some of the seeds in the jalapeno. If you don’t like spice, make sure you’ve removed all of the seeds, and you can even reduce the amount of the green flesh of the pepper that you put in the guacamole. 

Pin it for later 👇

1-Minute Guacamole (gluten free, vegan, paleo)


Guacamole Made In the Food Processor


The post Guacamole in the Food Processor appeared first on A Clean Bake.

Easy Marinated Onions with Sumac

$
0
0

Easy Marinated Onions with sumac will be your secret weapon for elevating any dish. Try them on salads, sandwiches, burgers and more!

Easy Marinated Onions with Sumac (gluten free, paleo, vegan, low carb)

While, on the surface, a post called “easy marinated onions” may seem like filler content for a week when I have run out of ideas, let me be the first to assure you that this isn’t a phoned in recipe. In fact, this may be the recipe that elevates your summer to The Summer of Awesome Meals.

Here’s how you do it:

Prepare your meal. Add these easy marinated onions. Meal Immediately Becomes Awesome.

Here: let’s run an experiment. What are you having tonight?

  • Burgers? Top with marinated onions.
  • A sandwich? Layer on marinated onions.
  • Salads? Oh, this is too easy.
  • Tacos? Eggs? You get the gist.

Even soup – no kidding – tastes wonderful with these marinated onions. Despite it being 90 degrees outside, we had the quickest cream of tomato soup (our go-to meal around here) for dinner on Sunday night, and garnished it with – surprise, surprise – marinated onions.

Easy Marinated Onions with Sumac (gluten free, paleo, vegan, low carb)

Ask me why I’m a maniac about these random, overly simple food. Go ahead.

Glad you asked!

Onions are a tricky ingredient. While, on the one hand, they impart essential flavor and are also, incidentally, an excellent prebiotic food (meaning they feed the probiotics, or good bacteria, in your gut that are so essential to good health and digestion), they are, on the other, really, really stank-ay, tainting your breath for far longer than seems reasonable. Not cute. Also, if you have IBS or an otherwise finicky digestive system, they can be irritating.

But when you marinate them in oil and acid, all that changes. Their harsh flavor and odor mellows and the little slices become soft and pliable – all the better for flopping a forkful on whatever you’re eating and, anecdotally speaking, digesting without any trouble. (Well, keep in mind that my sample size for this finding is one, so if you are terribly intolerant to onions, just avoid these.)


Easy Marinated Onions with Sumac (gluten free, paleo, vegan, low carb)

Since you’re smart enough to take it from here, I’ll leave you with the recipe so that you can get to marinating and start topping everrrrrything with these onions!

Sumac Marinated Onions

  • ½ red onion, (thinly sliced)
  • 6 Tablespoons extra virgin olive oil
  • ¼ cup white balsamic vinegar
  • ½ – 1 teaspoon sumac ((to taste))
  • 1/8 teaspoon salt
  1. Add the sliced onion to a medium jar or airtight container. 

  2. Add the rest of the ingredients to the container. Seal and shake vigorously for 10 seconds. 

  3. Taste, adjust ingredients to your preference. Reseal the jar and allow to marinate at least 10 minutes, and up to 48 hours.

Multiply the recipe as necessary

Store leftovers in an airtight container in the fridge for up to a week.

One you finish the onions, you can add more sliced raw white or red onions to the marinade and reuse it once or twice!


Easy Marinated Onions with Sumac (gluten free, paleo, vegan, low carb)

Note: This recipe was part of a chicken kebab dish I made for Simple Mills. Check it out here!

This post contains affiliate links, which means that if you click through and purchase a product, A Clean Bake receives a small commission. All proceeds go toward continuing to bring you delicious, healthy recipes every week, and this does not affect the price you pay. Thanks for supporting A Clean Bake!

The post Easy Marinated Onions with Sumac appeared first on A Clean Bake.


Acorn Squash Galette with Caramelized Onions and Thyme

$
0
0

Paleo-Acorn-Squash-Galette-With-Caramelized-Onions-And-Thyme

Look! I got my act together and made us a Thanksgiving recipe! Granted, it’s another side dish, but who doesn’t need another side dish idea the upcoming week for when you realize [insert way that things didn’t go to plan this week, as it never does for anyone every year]. No worries. I totally have you covered with this acorn squash galette. It tastes so fancy! But only takes a little while to make! Rustic imperfection is part of its charm! And you get the help of appliances to make it!

Paleo-Acorn-Squash-Galette-With-Caramelized-Onions-And-Thyme

Paleo-Acorn-Squash-Galette-With-Caramelized-Onions-And-Thyme

First, make the caramelized onions. But make them in your slow cooker, so you can go do other things while they’re caramelizing and you don’t have to wait around watching the oven. Also, make them in advance, since you can make a big batch and keep them in the fridge for awhile (up to 2 weeks, in my experience) or in the freezer for even longer (up to 2-3 months in an airtight container). So, that’s done.

Next, make the filling by roasting or steaming a small, peeled, seeded and sliced acorn squash (you can use butternut if you prefer; in order to quickly cook it, I peeled, seeded and sliced the squash and then quick-steamed it in a covered pan until soft) and toss it with the caramelized onions and seasonings. 

Finally, make the crust. All you have to do – and I mean this completely literally – is throw the ingredients, first dry, then wet, in a food processor and mix until a ball of dough forms. 

To assemble the galette, gather the dough in a ball, sandwich it between two pieces of wax or parchment paper and roll (or press) into a disc. Pour the filling into the center and fold the edges over to seal it all in (if you have any issues with the dough cracking, just wet your fingers and re-hydrate that part of the dough until you can seal the crack back together). Then brush with egg wash – which is an optional step, but helps with browning – and bake.

Paleo-Acorn-Squash-Galette-With-Caramelized-Onions-And-Thyme

I think it took me longer to type out the process than it did to actually carry it out. In case you don’t believe me that it really is that easy, you can see step-by-step pictures in this post. Or, better yet, you could try it for yourself and report back to me on how surprisingly low maintenance this savory acorn squash galette is to make, and how much credit you got to take for slaving away in the kitchen for “hours” leading up the Thanksgiving dinner. 😉

Acorn Squash Galette with Caramelized Onions and Thyme

gluten free, grain free, paleo friendly, dairy free option, lower carb

Ingredients for the filling

  • One small acorn squash (about 2/3 lb, steamed or roasted, peeled, seeded and sliced, and cooked until tender)
  • 1/2 cup caramelized onions
  • 1 Tablespoon fresh thyme leaves
  • 1/4 teaspoon fine sea salt
  • 1/4 teaspoon freshly ground black pepper

Ingredients for the crust

  • 1 1/2 cups blanched almond flour
  • 1/4 cup + 2 Tablespoons coconut flour
  • 2 Tablespoons fresh thyme leaves (loosely packed)
  • Pinch salt
  • 1/4 cup very cold butter (sub coconut oil, melted and cooled, for dairy free option, chopped into chunks)
  • 2 Tablespoons very cold water or milk of choice
  • 1 large egg white (about 2 Tablespoons)

Ingredients for finishing

  • 1 large egg (beaten)
  • 1 Tablespoon milk of choice
  1. Preheat the oven to 350F. Get out a baking sheet that is large enough to hold a piece of parchment, and set aside.
  2. Make the filling: In a large mixing bowl, gently fold together all of the filling ingredients until thoroughly combined. Set aside while you make the crust dough.
  3. Make the crust: In the bowl of a food processor fitted with the “s” blade, pulse the almond flour, coconut flour, thyme, salt and pepper together several times to combine. Add the butter (or coconut oil), and pulse several times until the butter pieces (if using) are the size of small peas. While the machine is on, pour in the milk and egg white and continue to process until the dough comes together in a large ball or mass.
  4. Scrape down the sides of the food processor bowl to make sure all of the dough is incorporated, and then turn out the dough ball onto a large sheet of parchment paper.
  5. Top with another sheet of parchment, and roll into a disc about 1/4″ thick. Make sure the disc fits within the width of parchment and the parchment fits on your baking sheet. If you need to make the dough disc a little thicker to make sure it fits, do so.
  6. Grasp the parchment firmly on both sides and, applying enough tension to keep the parchment paper as flat as possible, transfer the dough disc (with the parchment) onto the waiting baking sheet.
  7. Add the filling to the center of the crust, leaving about 2″ empty.
  8. Pick up one corner of the parchment and use it to fold the empty dough over the peaches. Then rotate a few inches and do the same again, folding the crust over the peaches (overlapping the first fold slightly). Continue to repeat this motion until the entire filling has been encased in the extra border of dough.
  9. Make the egg wash by whisking together the egg and milk. Brush the top and side of the galette dough (all exposed dough, NOT the filling), with egg wash.
  10. Bake for 30-40 minutes until the crust is firm and golden.
  11. Allow to cool on the baking sheet for at least 10 minutes before serving.
You can replace the acorn squash with butternut if you prefer.
In order to quickly cook the squash, peel, seed and slice it, then put the slices in a pan with about 1/2″ of water, cover it, and cook, stirring occasionally, until softened.
Tip for folding the dough: Using the parchment to fold helps minimize cracks but if your dough still cracks, just use your fingertips to gently smooth and reseal the crack. If that isn’t working well, dip your finger in a small bowl of water before smoothing over the cracks. This will rehydrate the dough and allow it to form a seal again.
This galette is best within a few hours of baking, but if you have leftovers, store them in an airtight container in the fridge for up to 3 days. Expect the crust to soften and get a little cake-ier with each day in the fridge.
Yield: One galette/approx 6-8 slices


Paleo-Acorn-Squash-Galette-With-Caramelized-Onions-And-Thyme

The post Acorn Squash Galette with Caramelized Onions and Thyme appeared first on A Clean Bake.

Radish Greens Pesto

$
0
0

Don’t throw away the greens that come on your bunch of radishes, make radish greens pesto instead! It’s nut free, gluten free, paleo, and vegan.

Radish-Greens-Pesto-Gluten-Free-Vegan-Paleo

There are plenty of pesto recipes on this site, sure, but this one is probably my favorite. Not necessarily because it tastes better than the others – they’re all good – but because I love the idea of repurposing something that would otherwise become trash. It’s like edible upcycling, if you will. Wait, I’m horribly uncool; is upcycling still a thing?

Just to be safe, let’s call it Turning Almost-Trash Into Something Delicious. I think we can get on board with that, right? 

Radish-Greens-Pesto-Gluten-Free-Vegan-Paleo

So, anyway, I am a firm believer that pesto can be made with almost any green leafy thing, and I think you should be too. And since we are coming up on prime radish season, I think we should do these under-appreciated subterranean gems the honor of using their greens just as deliciously as their bulbs (seeds? meat? what the heck do you call the radish part of the radish?). And the easiest way to use them is in radish greens pesto.

The greens are the component of the pesto formula, and the rest are things that you probably have in your pantry:

  • Nuts or seeds: instead of pricey pine nuts or sometimes-pricey walnuts, we’re using affordable pumpkin seeds here. I love NOW Foods’s raw, unsalted pumpkin seeds, and that’s what I use for this recipe.
  • Olive oil: Extra virgin please. A lot of the flavor shines through in this recipe, so use the best quality you have.
  • Salt, pepper and garlic: You already have these in your pantry. I even use granulated garlic instead of fresh to simplify, but if you want to use fresh (to taste) instead, feel free.
  • Traditionally, pesto has a hard cheese in it, but I leave it out of mine to keep it dairy free. Feel free to add cheese and reduce or eliminate the salt if you prefer.

Basically, this recipe boils down to getting two dishes out of a bunch of radishes, instead of one. What’s not to love?

Radish Greens Pesto

  • 2 bunches radish greens ((about 4 cups, packed))
  • 1/2 cup raw, unsalted pumpkin seeds
  • 1/4 cup extra virgin olive oil
  • 1 Tablespoon fresh lemon juice
  • 1.5 teaspoon granulated garlic
  • 3/4 teaspoon black pepper, (freshly ground)
  • 1/2 teaspoon fine sea salt
  • 1/4 cup water, (as needed)
  1. In the bowl of a food processor fitted with the s blade, pulse the radish greens and pumpkin seeds 10-20 times until finely chopped. 

  2. With the machine running, pour the olive oil in with the greens and seeds in a thin, continuous stream. 

  3. Stop the machine and scrape down the sides. Add the lemon juice, garlic, salt, and pepper, then process for 10-20 seconds until combined.

  4. With the machine still running, pour the water in, one Tablespoon at a time, until the pesto reaches your desired consistency. You may need more or less than 1/4 cup. 

  5. Serve immediately.

  • If you’re concerned about the pesto being too bitter, replace half of the radish greens with something milder like spinach, kale, or chard.
  • Store leftovers in an airtight container in the fridge for up to one week, or in the freezer for up to three months
  • Looking for ways to use the radishes that were attached to those greens? Try these fish taco bowls.

Radish-Greens-Pesto-Gluten-Free-Vegan-Paleo

Thank you to Now Foods for providing the ingredients that inspired this delicious recipe. This post contains affiliate links, which means that if you click through and purchase a product, A Clean Bake receives a small commission. All proceeds go toward continuing to bring you delicious, healthy recipes every week, and this does not affect the price you pay. Thanks for supporting A Clean Bake!

The post Radish Greens Pesto appeared first on A Clean Bake.

Paleo Orange Creamsicles

$
0
0

These paleo orange creamsicles use real orange juice to recreate a dairy free and naturally sweetened version of the childhood favorite!

Paleo-Orange-Creamsicles

It’s another one-post week, guys. I have had family visiting 3 weeks in a row now, which means less time for cooking and more excuses to go out for meals and sometimes that’s just… necessary. The weather is warming up and the sun is gracing us with its presence on a semi-regular basis, so who wants to be in the kitchen non stop? Who wants to crank up the oven when the weather is scorching? (Me. I do. Always. But hopefully you all have more sense than me.)

So I guess I made these paleo orange creamsicles for the same reason that I haven’t been blogging much: a break from the kitchen once in awhile is important. A break from cool, refreshing treats is never a good idea.

Paleo-Orange-Creamsicles

Sometimes, I worry that I get in a dessert rut when every idea I have ends in chocolate. When that happens, I think WWBWTE? That is, for those of you who aren’t in my warped little mind, “What Would Bryan Want To Eat”?

I’ve discussed before – ad nauseum, in fact – how different my husband’s preferences are from my own. He likes meat, I like vegetables and carbs. He likes fruit, I like chocolate. He likes creamy textures and buttery pastries, I like dense cookies and rich cake. He doesn’t even like sweets that much and when he does, he prefers store bought over homemade (though, because he’s a good husband, he’d never admit it). And he loves (LOVES) orange creamsicles, with their sugary interior and coating of a shade of orange that only exists in nature if you put a traffic cone in the middle of a forest.

Paleo-Orange-Creamsicles

I wish I could give you some cutesy diatribe about how I want to share a batch of popsicles with you but that would be a bold faced lie because they are gone. Long, long gone. Bryan devoured them, sometimes twice a day, and for someone who doesn’t actually love healthy homemade sweets, his excitement about these was, well, let’s say noteworthy.

So, I guess you could say they’re pretty good!

Orange Creamsicles

  • Juice and zest of 2 large oranges ((see note))
  • 1 cup unsweetened coconut milk ((full fat is best))
  • 1/4 cup maple syrup
  1. Stir together all ingredients until combined.

  2. Divide mixture between 6-8 popsicle molds. 

  3. Freeze until solid. 

  • If you prefer a stronger orange flavor and/or don’t have fresh oranges on hand, you an use 1 cup no-sigorange juice concentrate (defrosted)


Pin for later 👇

The post Paleo Orange Creamsicles appeared first on A Clean Bake.

Guacamole in the Food Processor

$
0
0

This easy from scratch guacamole is can be made in minutes using your food processor!

Guacamole Made In the Food Processor

This recipe is an another old one (as in: it’s been on the site before, but is now new and improved!), but does good guacamole that takes literally no – ok very little – effort ever really go out of style?

Nope, it doesn’t and especially not when summer picnic season is at its height.

Guacamole Made In the Food Processor

So, why does the internet need yet another guacamole recipe? Well, that’s a fair question. It is hardly a revelation to post a guacamole recipe at the time of year when people are gathered each weekend on someone’s back deck or patio, chips in hand, eagerly searching for a bowl of something to dip it in. I’m sure you’ve made guacamole 500 times before from 500 different recipes, including the one you made up on the spot.

But I can assure you that this recipes still deserves a place in your arsenal. Why? Because it’s easy. No, like really easy. Guacamole in and of itself isn’t the most complex of recipes, admittedly, but oh the monotony. The scooping, the chopping, blah blah. If there is an opportunity to make something even faster and easier, you know I’m all about it. And so is your food processor.

Guacamole Made In the Food Processor

That’s right: just roughly chop all of your ingredients so they’ll fit in the bowl, and pulse a few times for chunky guacamole, and a few more times for smooth. A few things to know about this guacamole:

  • Start with perfectly ripe avocados. Do you know the trick to determining the ripeness of an avocado? Pull off the stem and if the flesh underneath is green (and it feels tender when you squeeze it), it’s ripe. To ripen an avocado quickly, put it in a paper bag, fold the bag closed, and leave it on the counter in a warm kitchen. For even faster ripening, add a banana to the bag. Both fruits release ethylene gas, which speeds ripening. To prevent an avocado from ripening too quickly, put it in the fridge.
  • Choose sweet, flavorful tomatoes. This means selecting them at the peak of the season, ideally. And look for locally grown tomatoes, if possible Those which are shipped from far away are generally picked wayyyy before they are ripe (so that they don’t spoil in transit), and may either not be ripe or just be a mealy, flavorless mess by the time they make it to your kitchen. If you’re really at a loss for good tomatoes, don’t be afraid to use good quality canned chopped tomatoes instead of setting for bad fresh ones.
  • If you are not a fan of cilantro, use curly parsley instead.
  • If you like a lot of spice in your guacamole, leave some of the seeds in the jalapeno. If you don’t like spice, make sure you’ve removed all of the seeds, and you can even reduce the amount of the green flesh of the pepper that you put in the guacamole.

Easy From-Scratch Guacamole

  • 2 ripe avocados
  • 1 small red onion ((about 1/3 cup minced))
  • 2 roma tomatoes ((or 12 cherry tomatoes; about 1/2 cup diced))
  • 1 cup loosely packed cilantro leaves
  • Juice of 1 lime ((about 3-4 Tablespoons))
  • 1/2 jalapeno, (seeded and roughly chopped – leave a few seeds in for added spice)
  • 1.5 teaspoons salt, (or to taste)
  1. Combine all of the ingredients in the bowl of a food processor and pulse until chopped or smooth (whatever you prefer). 

  2. Taste and adjust seasonings to your preference.

  3. Serve immediately.
  • Start with perfectly ripe avocados. Do you know the trick to determining the ripeness of an avocado? Pull off the stem and if the flesh underneath is green (and it feels tender when you squeeze it), it’s ripe. To ripen an avocado quickly, put it in a paper bag, fold the bag closed, and leave it on the counter in a warm kitchen. For even faster ripening, add a banana to the bag. Both fruits release ethylene gas, which speeds ripening. To prevent an avocado from ripening too quickly, put it in the fridge. 
  • Choose sweet, flavorful tomatoes. This means selecting them at the peak of the season, ideally. And look for locally grown tomatoes, if possible Those which are shipped from far away are generally picked wayyyy before they are ripe (so that they don’t spoil in transit), and may either not be ripe or just be a mealy, flavorless mess by the time they make it to your kitchen. If you’re really at a loss for good tomatoes, don’t be afraid to use good quality canned chopped tomatoes instead of setting for bad fresh ones. 
  • If you are not a fan of cilantro, use curly parsley instead. 
  • If you like a lot of spice in your guacamole, leave some of the seeds in the jalapeno. If you don’t like spice, make sure you’ve removed all of the seeds, and you can even reduce the amount of the green flesh of the pepper that you put in the guacamole. 

Pin it for later 👇

1-Minute Guacamole (gluten free, vegan, paleo)


Guacamole Made In the Food Processor


The post Guacamole in the Food Processor appeared first on A Clean Bake.

Easy Marinated Onions with Sumac

$
0
0

Easy Marinated Onions with sumac will be your secret weapon for elevating any dish. Try them on salads, sandwiches, burgers and more!

Easy Marinated Onions with Sumac (gluten free, paleo, vegan, low carb)

While, on the surface, a post called “easy marinated onions” may seem like filler content for a week when I have run out of ideas, let me be the first to assure you that this isn’t a phoned in recipe. In fact, this may be the recipe that elevates your summer to The Summer of Awesome Meals.

Here’s how you do it:

Prepare your meal. Add these easy marinated onions. Meal Immediately Becomes Awesome.

Here: let’s run an experiment. What are you having tonight?

  • Burgers? Top with marinated onions.
  • A sandwich? Layer on marinated onions.
  • Salads? Oh, this is too easy.
  • Tacos? Eggs? You get the gist.

Even soup – no kidding – tastes wonderful with these marinated onions. Despite it being 90 degrees outside, we had the quickest cream of tomato soup (our go-to meal around here) for dinner on Sunday night, and garnished it with – surprise, surprise – marinated onions.

Easy Marinated Onions with Sumac (gluten free, paleo, vegan, low carb)

Ask me why I’m a maniac about these random, overly simple food. Go ahead.

Glad you asked!

Onions are a tricky ingredient. While, on the one hand, they impart essential flavor and are also, incidentally, an excellent prebiotic food (meaning they feed the probiotics, or good bacteria, in your gut that are so essential to good health and digestion), they are, on the other, really, really stank-ay, tainting your breath for far longer than seems reasonable. Not cute. Also, if you have IBS or an otherwise finicky digestive system, they can be irritating.

But when you marinate them in oil and acid, all that changes. Their harsh flavor and odor mellows and the little slices become soft and pliable – all the better for flopping a forkful on whatever you’re eating and, anecdotally speaking, digesting without any trouble. (Well, keep in mind that my sample size for this finding is one, so if you are terribly intolerant to onions, just avoid these.)


Easy Marinated Onions with Sumac (gluten free, paleo, vegan, low carb)

Since you’re smart enough to take it from here, I’ll leave you with the recipe so that you can get to marinating and start topping everrrrrything with these onions!

Sumac Marinated Onions

  • ½ red onion, (thinly sliced)
  • 6 Tablespoons extra virgin olive oil
  • ¼ cup white balsamic vinegar
  • ½ – 1 teaspoon sumac ((to taste))
  • 1/8 teaspoon salt
  1. Add the sliced onion to a medium jar or airtight container. 

  2. Add the rest of the ingredients to the container. Seal and shake vigorously for 10 seconds. 

  3. Taste, adjust ingredients to your preference. Reseal the jar and allow to marinate at least 10 minutes, and up to 48 hours.

Multiply the recipe as necessary

Store leftovers in an airtight container in the fridge for up to a week.

One you finish the onions, you can add more sliced raw white or red onions to the marinade and reuse it once or twice!


Easy Marinated Onions with Sumac (gluten free, paleo, vegan, low carb)

Note: This recipe was part of a chicken kebab dish I made for Simple Mills. Check it out here!

This post contains affiliate links, which means that if you click through and purchase a product, A Clean Bake receives a small commission. All proceeds go toward continuing to bring you delicious, healthy recipes every week, and this does not affect the price you pay. Thanks for supporting A Clean Bake!

The post Easy Marinated Onions with Sumac appeared first on A Clean Bake.

Viewing all 87 articles
Browse latest View live


Latest Images